Well Hello! I've had a very busy week and so I'm just now getting to post this week's project. Yesterday I made a Lap-Top Slipcover! I originally found a tutorial for this on Pintrest and couldn't wait to make one! I'm not going to pretend like I know more about sewing than the women who wrote this tutorial, so I'll just write about my experience sewing this project and the few slight changes I made.
I had a lot of fun sewing this! My machine didn't act up at all during sewing so that made it a whole lot more enjoyable! This is a great project!
What I learned through this project...hmm, she made the tutorial so easy to follow and it was pretty basic to sew. Before I stared sewing I cleaned out my machine casing because the top thread kept getting caught in the bobbin bellow, so I guess I learned the importance of keeping a clean machine!
Alright, so following the tutorial I started by gathering all the materials.
First I measured my laptop and figured the dimensions for the panels. Then I cut out 2 panels from the cotton (exterior) and 2 from the fleece (lining).
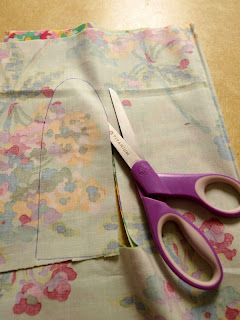
Next I had to draw a template for the straps. I am NOT an artist when it comes to drawing so I had to mess with this a little bit to get it right, and even then it wasn't perfect...oh well. Then I cut out the straps. Again, 2 from each fabric.
Here they are all cut out and put together. (I know I've got ugly counter tops!)
Then I sewed them together. Going around the curve was a little hard, but I figured it out and got better by the time it came to top stitch them. By the way, I figured out that it's easier to sew when the cotton is facing down, otherwise the fleece doesn't move along and could get caught in the teeth. (Even with the feeding teeth on the lowest setting.)
Here they are both stitched.
After they are both stitched, turn them inside out and iron them flat.
Then it's time to top stitch around the outside to make it look really cute!
Here they are both top stitched and ready to be set aside for later. (Yeah, I don't know why the one on the right has that funny little bump on it...that's what I love about homemade things though, they have personality!)
Now, I don't have a buttonhole maker so I skipped that whole section in the tutorial, I'll show you what I did instead later on.
Next I pinned the 2 cotton panels right sides together and sewed along the 2 long sides and one short side.
Then I sewed the straps onto one side of the opening on the cotton fabric like this.
Then I was ready to sew the fleece lining together. Like she explains in the tutorial, I sewed up the 2 long sides and about 2/3rds of one of the short sides leaving an opening in the middle as you can see in the photos bellow.
The next steps were a little complicated and I was so focused on doing it right that I didn't get any photos! I did it just like she does in the tutorial. So refer back to it for these steps. So it ends up looking like this.
Then I hand stitched the hole in the bottom of the fleece together to close it up.
Then feed the lining back into the exterior and work the corners together. Then it looked like this and was nearly done!
Next you top stitch around the outside of the opening like this. I love the way it looks with the top stitching!
Now for what I did differently because I don't have a button hole maker. Easy, just little velcro tabs sewed where the button would be. I started hand sewing the velcro on but it wasn't holding strong enough, so I decided to machine stitch it on. Now it holds great!
Then I hand stitched the buttons to the front of the tabs just for decoration, and to hide the velcro stitches. Then it was finally done!
Last week's project took me a full 10 minutes to complete. This week however took me about 4 1/2 hours from start to finish! Ha! It was still a simple project though, and I had a ton of fun making it! I hope you do too!
See you next week!
Enjoy!


No comments:
Post a Comment